Recently modeled and textured this Lamino chair which I think has a very characteristic and stylish design with wood =) It has 2 versions, leather and sheep fur. I am planning to render these chairs inside a building when I have some free time.


white on white
Again another studio setup from me. This time this "white on white" !
I created this studio setup, trying to have a better understanding of the behaivor of Vraylights. It is amazing Apple keyboard, and the model is a courtesy of Ronen Bekerman forums - "Free Friday" =)


Structures by Michael Hansmeyer
in News

I encountered these very intesting page: Michael Hansmeyer and his cardboard structures which are created using an subdivison algorithm.
Michael Hansmeyer is both an architect and a programmer. On his site, there are more of his amazing works, creating a very unique atmosphere reminding me of both history and highly futuristic environements.
Please check out the site to see more of this this architect /programmer's amazing works :
http://gizfactory.com/article/intricate-cardboard-structures-by-michael-hansmeyer/
Archipelago
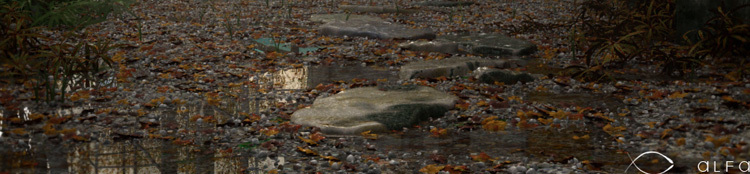
I have been inspired from a movie I have watched and created this scene as an imaginary cinematic environment. It was a challenge for me to create this environment with smallest details with my slow workstation.
I used a lot of Particle Flow and different scattering techniques including manual painiting with Advanced Painter script.
When I have time, I would like to make some partial renders showing the detail on ground.
Lights and Textures 2
Again working on studio setups and lighting! It is a very nice way to get to know how CG lights work.
This is the Decode Lamp. It is real fun to model and texture nice design objects. It was a good texturing experience as well.


Lights and Textures 1
Studying on studio setup lighting and trying to mimic product photograhy. I am often amazed how images, photographs sometimes look better than the object itself in real so decided to study more about how light shapes objects in reality to create more appealing forms and compositions.
This is the Pancras chair which I have used in a former scene "My Bedroom Concept" and I really like the form and stype of this chair a lot. Making detailed textures and close-up renders is great fun for me. Actually I discover that I love texture painting a lot!


2010 CGArchitect Annual 3D Awards
in News
My works have been shortlisted one of the top 5 for the 2010 3D Awards by CGArchitect.
http://www.cgarchitect.com/3dawards_mini/nominees/
Every year, the CGArchitect, a very popular site for 3D visualisers, gives Annual Best Visualisation Awards. The contest is open to anyone and over 2000 visualisation artists from different countries all over the world, send their renders to be evaluated. The jury evaluates all the works and short-lists the top 5 , which is one of my renders.
Visualisation Pro Of the Week
in News

"My Bedroom Concept" project has been granted as the Visualisation Pro Of the Week by CGArchitect.
(March 17,2010)
You can view the project on CGArchitect through the link below:
http://forums.cgarchitect.com/40205-alfa-smyrna-pixela-march-17-2010-a.html
You can find the details of the scene under Scenes In Depth cayegory as well.
Creating Fury Chair with Hair&Fur Modifier
in Tutorials

I have prepared a new tutorial on Max Hair& For modifier for Ronen Bekerman Architectural Visualisation Forums,one of the most innovative sites of the community.
This is an article tutorial telling about how to create a fury object with 3dsMax Hair and Fur Modifier. I explained how I created the chair in my scene "My Bedroom Concept."
You can check the tutorial on Ronen's site where it is hosted :
http://www.ronenbekerman.com/hair-fur-in-3d-studio-max/
Hope you find it useful.
Making Of My Bedroom Concept Scene
in Tutorials
This is a Making Of Tutorial that I have created for Evermotion, one of the leading forums of the industry.Inside the tutorial, you can find the various stages of the project Modelling, Texturing and Lighting as well as tips about how to create specific effects.
The tutorial is hosted on Evermotion site and you can follow it by clicking the link:
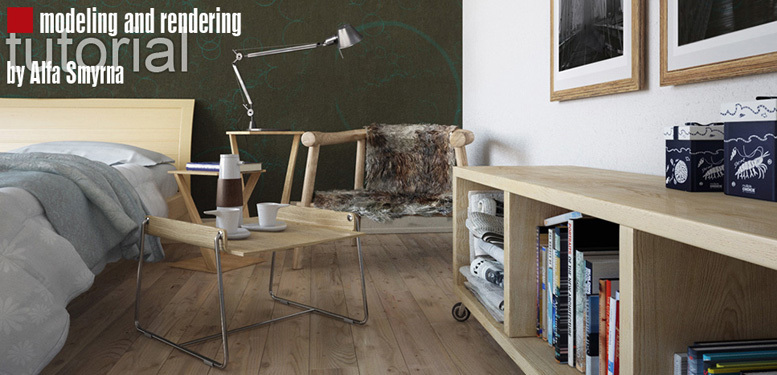
http://www.evermotion.org/tutorials/show/7952/modeling-and-rendering-tutorial-by-alfa-smyrna
3d total Excellence-My Bedroom Concept
in News

Another nice news for "My Bedroom Concept" !
It has been granted with 3D Excellence Award from
www.3dtotal.com .
You can view the project on 3DTotal site under the Gallery section.
You can find the details of the scene under Scenes In Depth category as well.
Best Of Evermotion-My Bedroom Concept
in News

Nice news today!
My Bedroom Concept scene has been granted with the Best Of Evermotion Award.
You can view the project on Evermotion site through the link below:
http://www.evermotion.org/vbulletin/showthread.php?78852-My-Bedroom-Design
You can find the details of the scene under Scenes In Depth category as well.
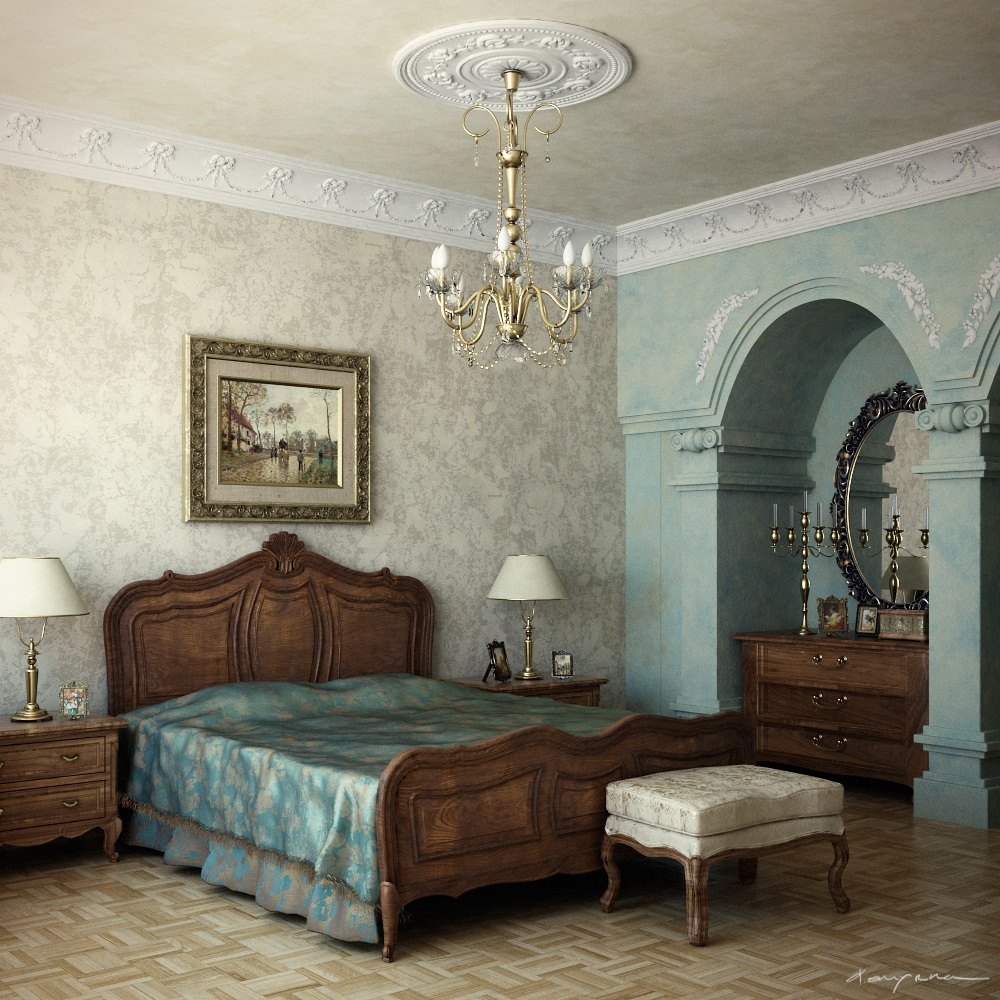
Bedroom Concept
This is a Bedroom Concept designed by me. Chairs are Pancras Chair and Uriquala Chair. The wardrobe and the bed are my own designs. All the models are self-made.
I tried both curtains and blinds on windows and in some shots there is curtain and in some there are blinds instead. I flipped one of the shots just because I like it more that way :)


Pebbles With Particle Flow
in Tutorials
This is the 2nd part of the Ground Elements tutorial. You can find the 1st part here. In this part, I will try to explain how I create grass with Particle Flow.
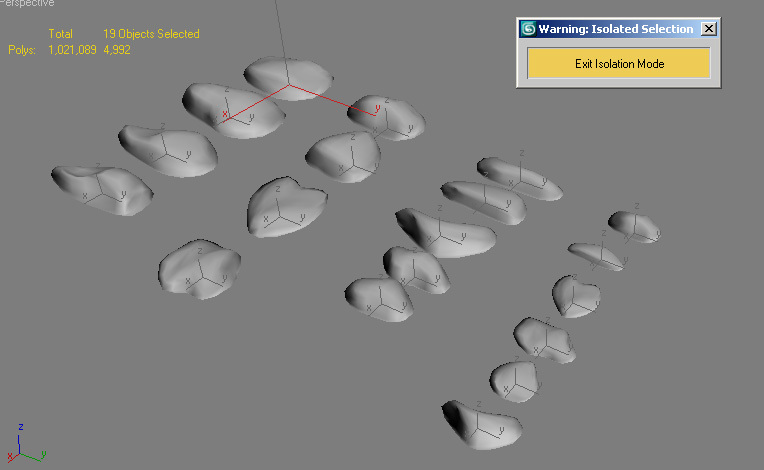
First, I modeled few different little stones. I modeled the stones of vraying sizes and shapes. 19 different stones was enough for to build the variance.
Then I converted these meshes into VrayProxy to save RAM. VrayProxy is an excellent feature of vray. Neil Blevins has written a very good tutorial about scattering objects in www.neilblevins.com After reading this tutorial, I decided to use a similar method.
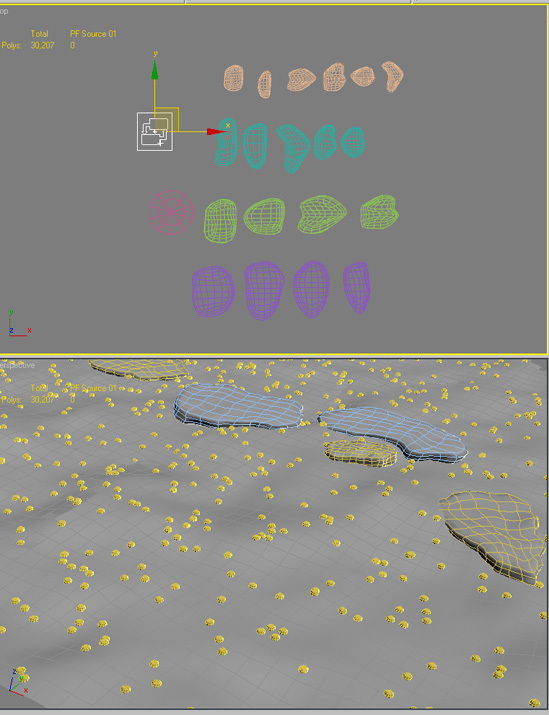
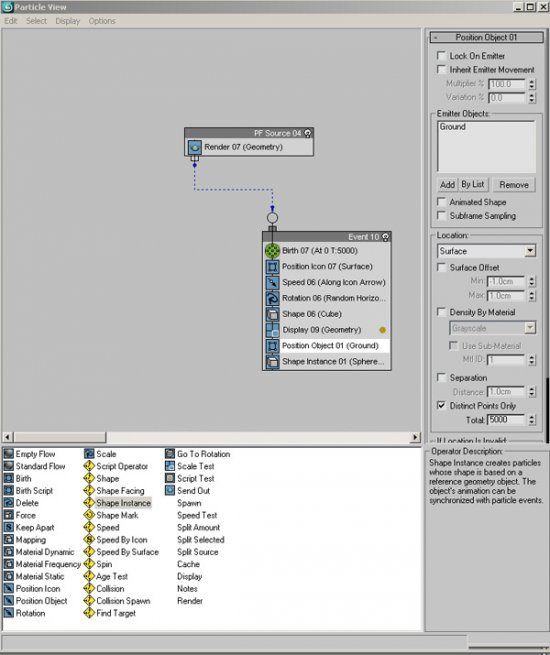
I created a Particle Source. You can control all parameters of your ParticleFlow when you go into Particle View. PLease look in the 1st part of the tutorial: Grass With Particle Flow about detailed of Particle FLow Settings. ShapeInstance operator is to choose the particle geometry object. In my case it is the sphere. The PositionObject operator is to choose the emitter object. From birth operator, you can adjust the amount of particles. If you want to scatter different type of geometry, you can make a parent dummy object and link the child objects to this. In my case, this is not necessary.
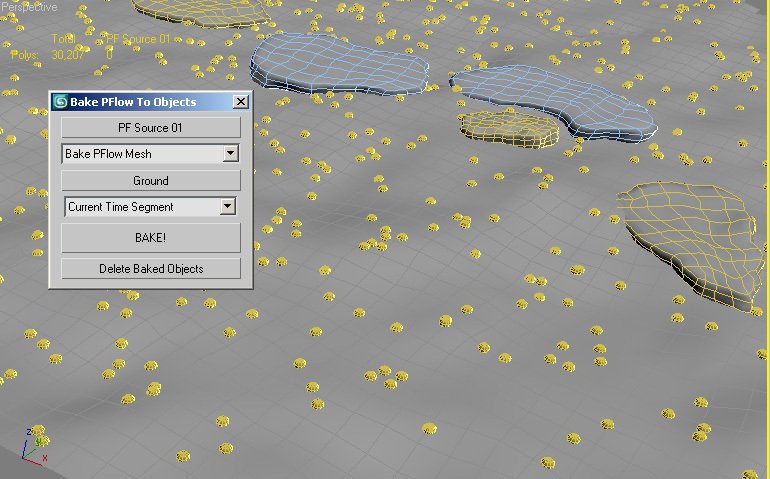
Proxy objects loose their proxy charecteristic if they are scattered directly. I replaced this sphere meshes with proxied pebble models in the later steps. After distributing the spheres with the particle flow, I baked the particles into a mesh by using Bobo's BakePFlowToObjects script. By making this, all particles become geometry so we can replace them. You can find this very useful script in www.scriptspot.com
To replacing the particles with VrayMeshes (proxy objects of little stones),I used another great script ObjectReplacer by Neil Blevins. (www.neilblevins.com) I replaced all dummy spheres with the meshes. This steps were necessary to be able to retain the proxy characteristic of the scattered objects. Position, Rotation, Scale properties are adjustable.
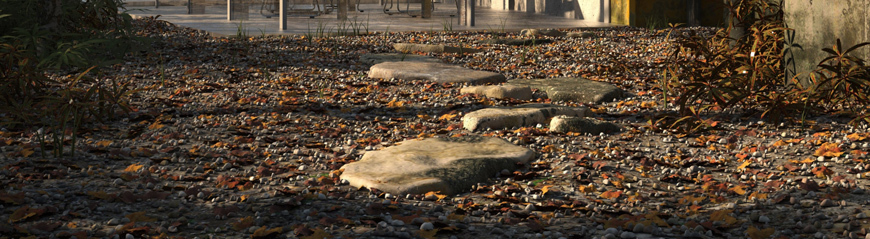
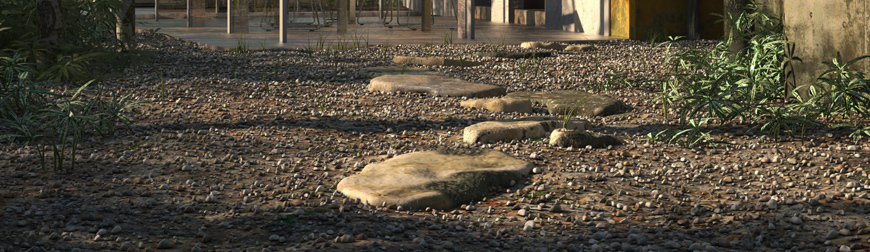
Below you can see the results I have created using this method:
Grass With Particle Flow
in Tutorials

Actually, this is not a new tutorial; I created this as a part of the Making of Story for my scene Time Under Trees. But I have been requested few times to publish this part in a seperate tutorial so it can get listed in the search engines and include a grass version of the same method. This first part is about how to create grass using Particle Flow Method. (Please click on images to view in higher resolution.)
First, I modeled few different grass strands to scatter around.
Then I created a Particle Flow System.
When you click on the Particle view, you can see the settings of Particle Flow in a new window. Here as the first step, I set the Emit Start and Emit Stop value to 0 as I am not animating but using it for a still image. You can specify the number of particles.I choose my Emitter Object with the Position Object Operator. This is for schoosing the object that we scatter our particles on (emitter).
In the Rotation Operator, it is important to choose Random Horizantal. This setting provides us to limit our rotation on the surface plane, without rotating on the volume.
To choose particle geometry object (our meshes to that will scatter around), we will use Shape Instance Operator. To scatter different objects, you can group them and enable the "Group Objects" settings or you can make a parent dummy object and link the child objects to this. I used a basic primitive box object because my target is to get use of VrayProxy Objects for my particles. I will talk about this in next steps. Now we will distribute the box object.
After distributing the boxes with the particle flow, I baked the particles into a mesh by using Bobo's BakePFlowToObjects script. By making this, all particles become a mesh so they can be replaced. You can find this very useful script in www.scriptspot.com
To replacing the particles with VrayMeshes (proxy objects of little stones),I used another great script ObjectReplacer by Neil Blevins. (www.neilblevins.com) I replaced all dummy boxes with the meshes. These steps aew necessary to retain the proxy characteristic of the scattered objects. Position, Rotation, Scale properties are adjustable.
And now you have your grass as geometry created with Particle FLow.
Classical Bedroom
This is an architectural visualisation of a classically decorated hotel room. It is the first time I am working on a classical interior and it was different and interesting to make different textures, shaders and models.


House1 | Architectural Visualisation
This is an architectural visualisation of a house for a sculptor and his wife. Grass is 3D geometry and I created this with the Particle Flow Method as I have created the pebble stones in Time Under Trees. After making a tutorial about creating these pebbles, many people requested me to make a tutorial for creating grass in a similar method. You can find my workflow and the tutorials under tutorials category.


Space For Meditation by Tadao Ando
Space For Meditation by architect Tadao Ando. Tadao Ando is one of my favorite architects. I love his unique way as he works with natural elements or material's own nature into his architecture. This was one of his very interesting buildings, A Space for Meditation. It was built in 1995 in Paris- UNESCO complex for the 50th anniversary of United Nations. The ground stones are granitic stone after the atomic bomb in 1945 in Hiroshima and Nagazaki. I hope to visit this place one day, until that time, for now I enjoyed so much making this building in 3D =)


Image Of The Week-Time Under Trees
in News
Time Under Trees: Fall Image has been granted to be the Image of The Week in Vismasters Site http://vismasters.wordpress.com/2009/06/05/55/
In Top 5 for CGarchitect Awards
in News
I have been selected as one of the top 5 nominees for the 2009 CGArchitect Architectural 3D Awards from over 500 images for the Best Architectural Exterior Image Category.